Creating a third-person game in GDevelop, a powerful open-source game development engine, is a fascinating journey that combines creativity and technical skill.
What is a Third-Person Game?
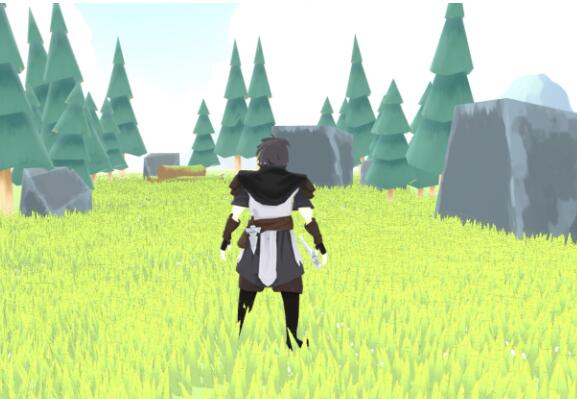
In a third-person game, the player controls a character from a perspective where the camera is placed behind and slightly above the character. This allows the player to see their avatar, as well as the environment around them, offering a greater sense of immersion and spatial awareness.
Why Use GDevelop?
GDevelop is an intuitive, event-based game engine that is accessible for beginners and powerful enough for more experienced developers. It does not require programming knowledge, making it an ideal tool for those new to game development, while still offering plenty of customization options through its event system.
Objectives of This Guide
This tutorial will cover the essential aspects of making a third-person game, from creating the character and setting up controls to managing the camera system and adding interactive elements. By the end of this guide, you’ll have the knowledge to create your own third-person game prototype using GDevelop.
Step 1: Setting Up GDevelop
Before you dive into the game development process, you’ll need to set up GDevelop and create a new project.
Download and Install GDevelop
Visit GDevelop’s website and download the latest version for your platform (Windows, macOS, or Linux).
Follow the installation instructions for your operating system.
Create a New Project
Open GDevelop and click on Create a new project.
Select the Empty Game template, as this will give you a blank canvas to start building your third-person game.
Choose a name for your game and specify the project location.
Step 2: Designing the Game World
1. The Game Environment
A third-person game requires an engaging environment for the player to explore. You will need to design or import assets for the terrain, buildings, and other objects in the world. Here’s how you can set up a simple 3D environment:
Create the Terrain:
GDevelop is primarily a 2D engine, so creating a 3D game world from scratch can be challenging. However, you can simulate a 3D perspective using isometric tiles or layer effects.
Use the Tilemap or Sprite objects for basic level design, and consider importing 3D models or assets for characters and other objects.
Importing Assets:
GDevelop allows you to import images, sprites, and sound effects. You can create your own assets in tools like Blender or Pixie for 2D pixel art, or download assets from free libraries like OpenGameArt or Itch.io.
For a third-person game, you’ll likely need 2D sprites for characters, background environments, and possibly 2D models simulating 3D perspectives.
Set Up Layers:
GDevelop supports layers, which allow you to stack objects on top of one another. This is especially useful for creating depth in your game environment, where you can place obstacles, platforms, and other elements relative to the camera angle.
2. Camera Setup
In a third-person game, the camera is one of the most important components. The camera needs to follow the player character while maintaining a consistent angle behind them. Here’s how you can achieve this in GDevelop:
Create a Camera Object:
Add a new Camera object that will follow the player. This can be done by creating a new sprite that acts as the viewpoint of the camera.
Positioning the Camera:
Using the event system in GDevelop, set the camera’s position to follow the player’s character at a fixed distance. For example:
ini
Camera.X = Player.X + offsetX Camera.Y = Player.Y + offsetY
Smooth Camera Movement:
Implement smooth transitions by gradually moving the camera towards the player’s position instead of snapping directly. You can use the Tweening feature in GDevelop for smooth camera interpolation.
Rotation and Angle:
Adjust the camera angle to ensure it stays behind the player’s avatar. Use the rotation or angle properties to maintain this perspective.
Step 3: Creating the Player Character
Creating the player character involves designing the sprite, adding animations, and programming controls for movement.
1. Character Design and Sprites
Import Character Sprites: Use a sprite sheet or individual frames for your character’s animations. You may need idle, walking, running, and jumping animations.
Setup Animations: In GDevelop, create an Animation for each state of the player character, such as idle, walk, and run. Assign each animation to the corresponding movement action.
2. Player Movement
To make the character move in a third-person perspective, you need to map out the player’s movement on the keyboard or gamepad. The controls in third-person games are typically WASD for movement, or the left analog stick for a controller.
Setting up Controls: Use GDevelop’s event system to bind movement actions to keyboard or controller inputs. For example:
vbnet
If Key W is pressed Player.Y = Player.Y – 1 (move forward)
Implementing Basic Physics:
GDevelop supports basic physics, which can be used to apply gravity and collision detection. Add a physics behavior to your player character and set the appropriate gravity value for the environment.
Walking and Running: Implement different speeds for walking and running by adjusting the character’s movement speed. Use WASD for walking and add a Shift key for running.
Step 4: Adding Third-Person Camera Controls
In addition to the basic camera-following mechanics, you’ll likely want to allow the player to control the camera’s angle and distance.
1. Rotating the Camera:
Allow the player to rotate the camera around the character. This can be done by mapping mouse or joystick input to rotate the camera around the player.
Example GDevelop event:
csharp
If Mouse button is pressed Rotate Camera by X degrees based on Mouse movement
2. Zooming In and Out:
Implement a zoom feature so the player can adjust the camera’s distance from the character.
Use the mouse wheel or a button press to change the camera’s zoom level, adjusting the offset values dynamically.
Step 5: Adding Interactivity and Game Mechanics
In a third-person game, the player often interacts with objects, NPCs, or other elements within the environment. These interactions need to be managed within the event system.
1. Object Interaction:
Use collisions to trigger interactions when the player approaches an object. For instance, a prompt could appear when the player is near a door or item to pick up.
Example event:
mathematica
If Player collides with Door Display “Press E to open” message
2. Combat and Health Systems:
You can implement a combat system by adding hit detection (collisions between the player and enemies).
Create a health variable for both the player and enemies to track damage and deaths.
Step 6: Polish and Debugging
Once you have the core mechanics set up, it’s time to polish and debug your game.
Test the Controls: Ensure the movement, camera, and interaction mechanics work seamlessly. Adjust values to ensure smooth transitions and comfortable controls.
Optimize for Performance: If your game is running slow or lagging, try to optimize your game’s assets and performance. You can reduce sprite sizes, limit the number of objects on the screen at once, or optimize physics settings.
Bug Testing: Playtest your game thoroughly to catch any bugs or glitches. Pay attention to the camera’s behavior, character movement, and interactions with the environment.
Step 7: Exporting and Sharing Your Game
Once your game is complete, GDevelop allows you to easily export your project to various platforms.
Export to Web: You can export your game to HTML5 and share it on websites or game platforms like itch.io.
Export to Desktop: You can create standalone executables for Windows, macOS, and Linux.
Export to Mobile: GDevelop also supports exporting to Android and iOS, though you’ll need to set up specific export templates for these platforms.